The restoration that sheds light on a work affected by the passage of time.

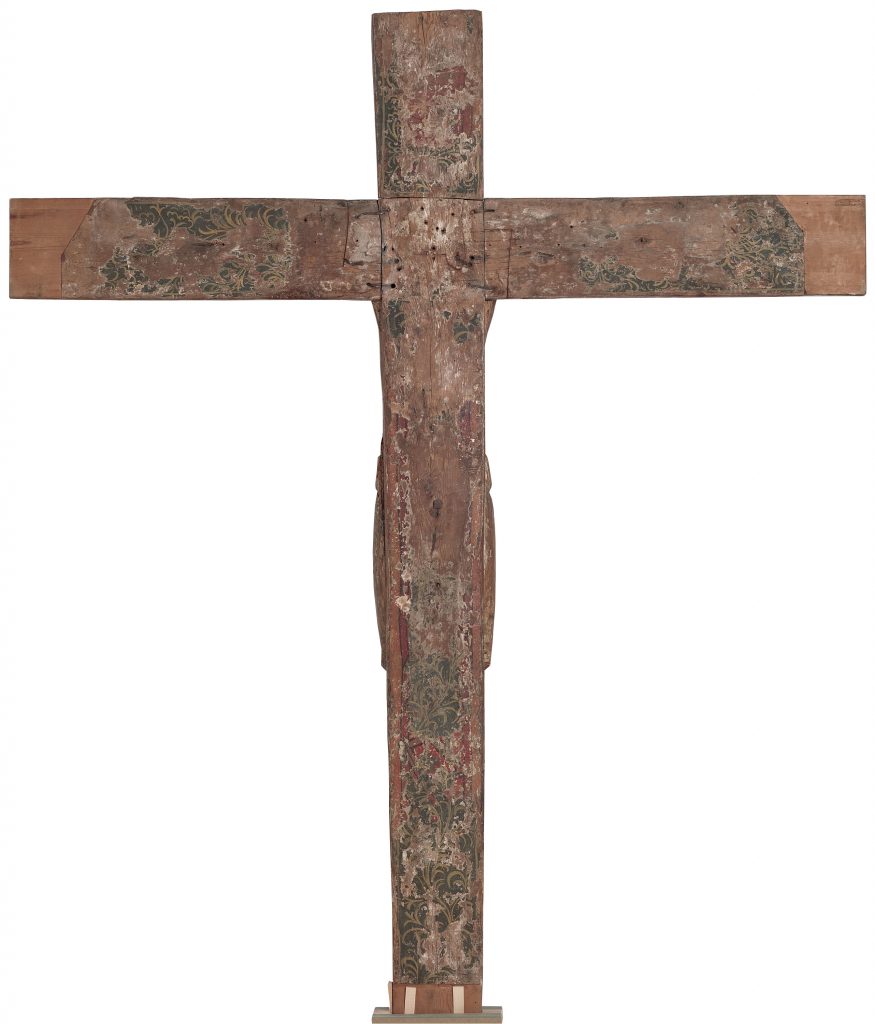
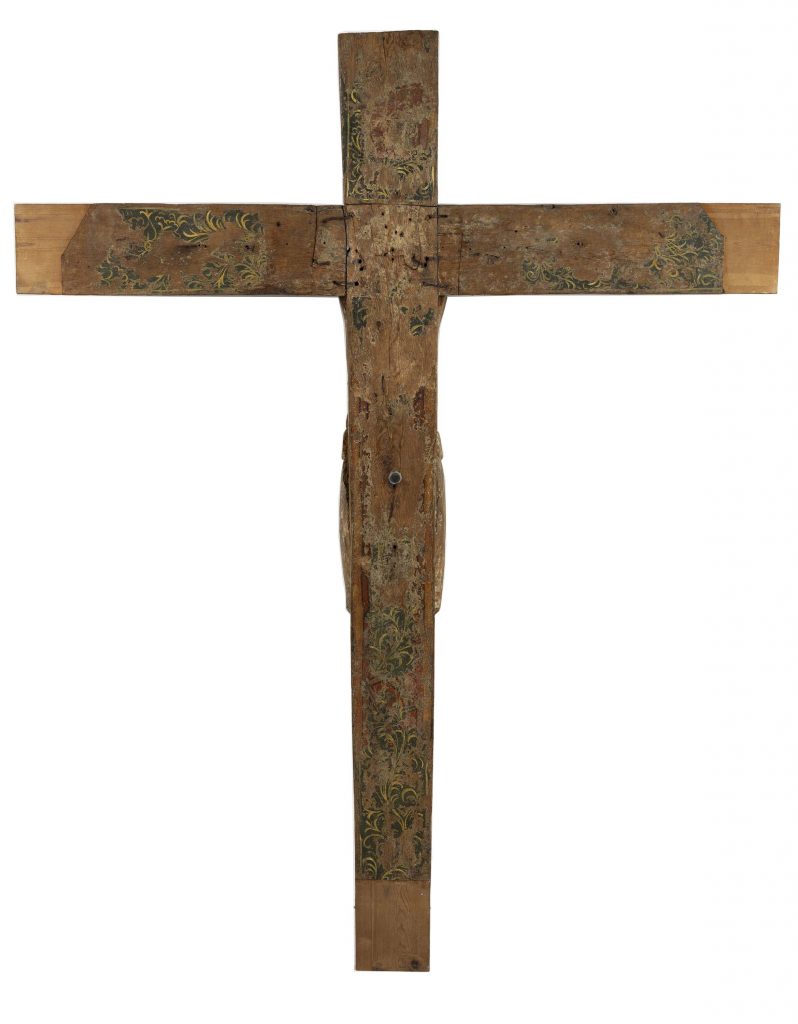
Front and back of the Christ and the cross prior to restoration. Photograph by Jordi Calveras.
In the post published on 10 June last year reference was made to the many earlier restorations prior to the admission of the Christ and the cross from Capdella to the Museum. It also talked about the study and assessment of the various reuses of materials and elements of diverse provenance in this group, with the intention of updating it and adapting it to new tastes and liturgical uses.
In this article I shall refer to the process of conservation-restoration of these two pieces, which were quite badly damaged, especially the Christ, extremely fragile, due to its great age and to the modifications and the ageing processes of the materials that were not always in the most optimal environments.
Undertaking the restoration of the Christ and the cross from Capdella has meant making an overall study of the work and considering a proposal for intervention that out of necessity has had to take very diverse aspects into account. In one sense the earlier restorations and changes that are part of the work’s history have been respected, changing only one socket of the Christ’s arms to be able to recover the original one. The conservation of the piece has also been prioritized by doing intense work to consolidate the support of the Christ in order to carry out the entire overall restoration process. Finally, it was borne in mind that this group, due to its singular nature, will be exhibited in the rooms of the Museum’s permanent Romanesque collection, and, from this perspective, the aim has been to achieve a harmonious final appearance, integrating all the elements in the whole.
The cross
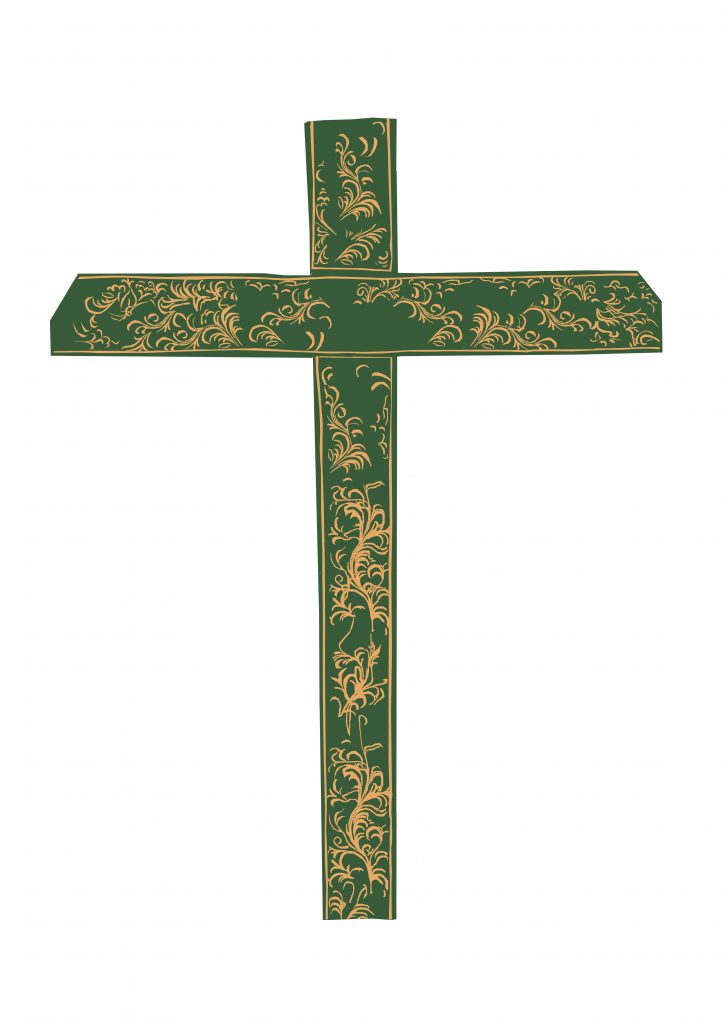
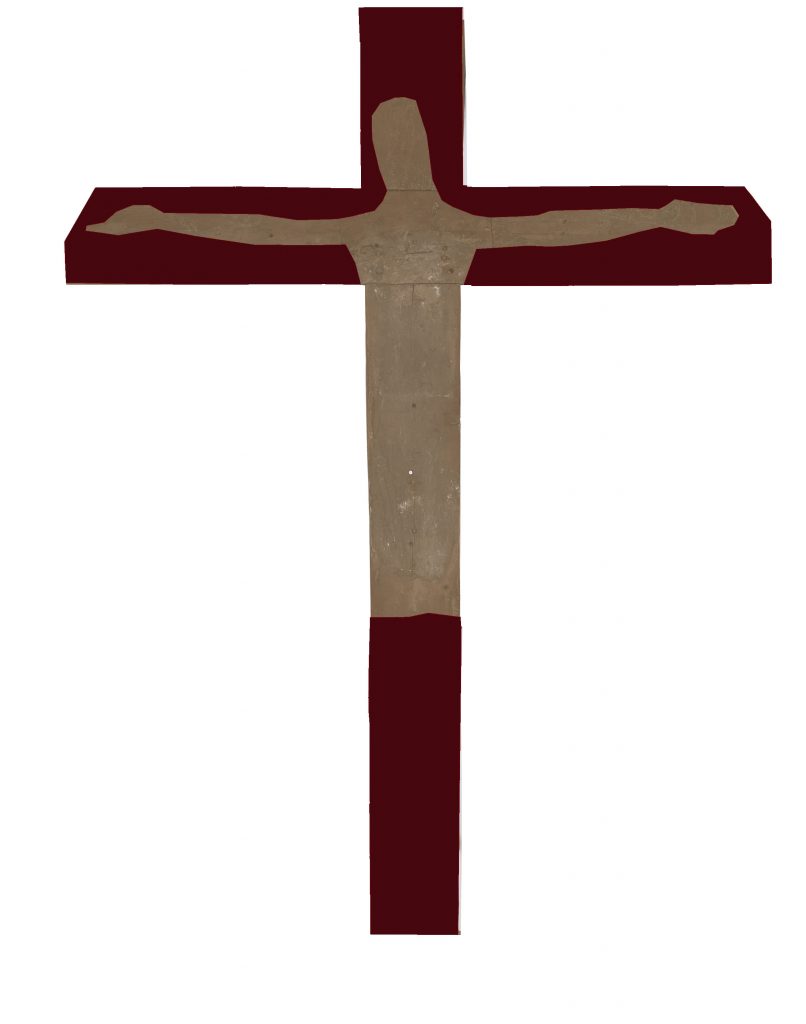
In the previous post I talked about all the information that refers to the study of the different polychromies applied over the years to adapt the piece to the new Christ and to the aesthetic novelties of the time. I shall now make a graphic summary with virtual images.
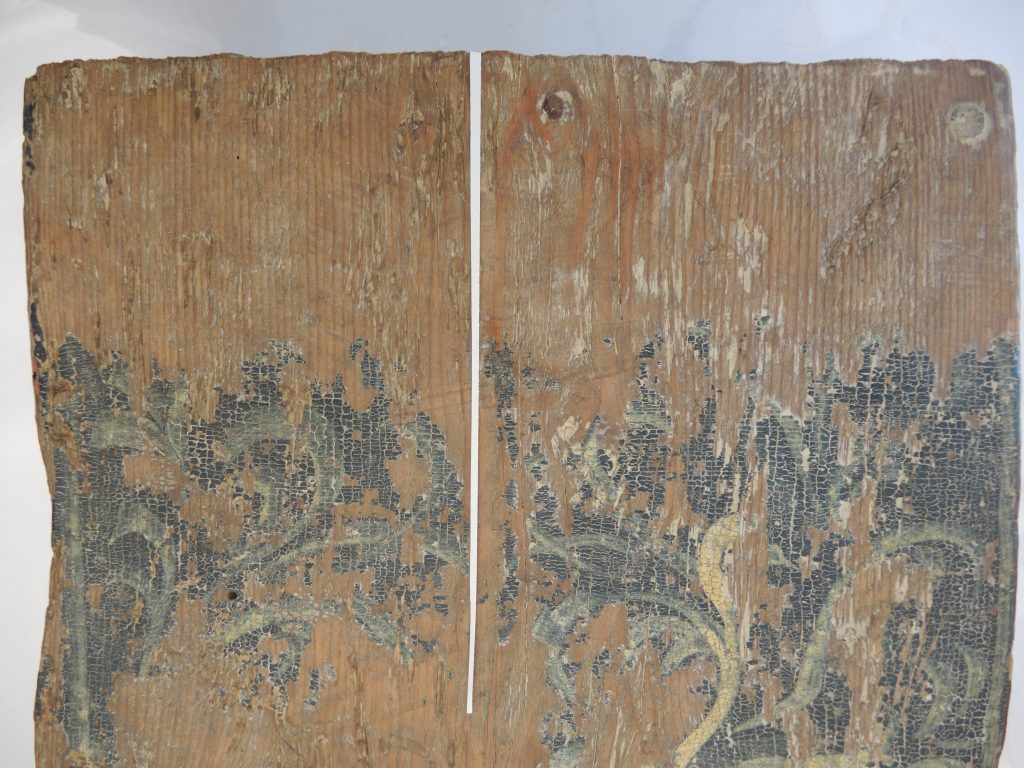
Polychromies on the back at present:

First polychromy before the cross was cut short / Second polychromy. Photos: Anna Carreras
Polychromies on the front at present:

First polychromy / Second polychromy removed. The first one is now visible. Photos: Anna Carreras
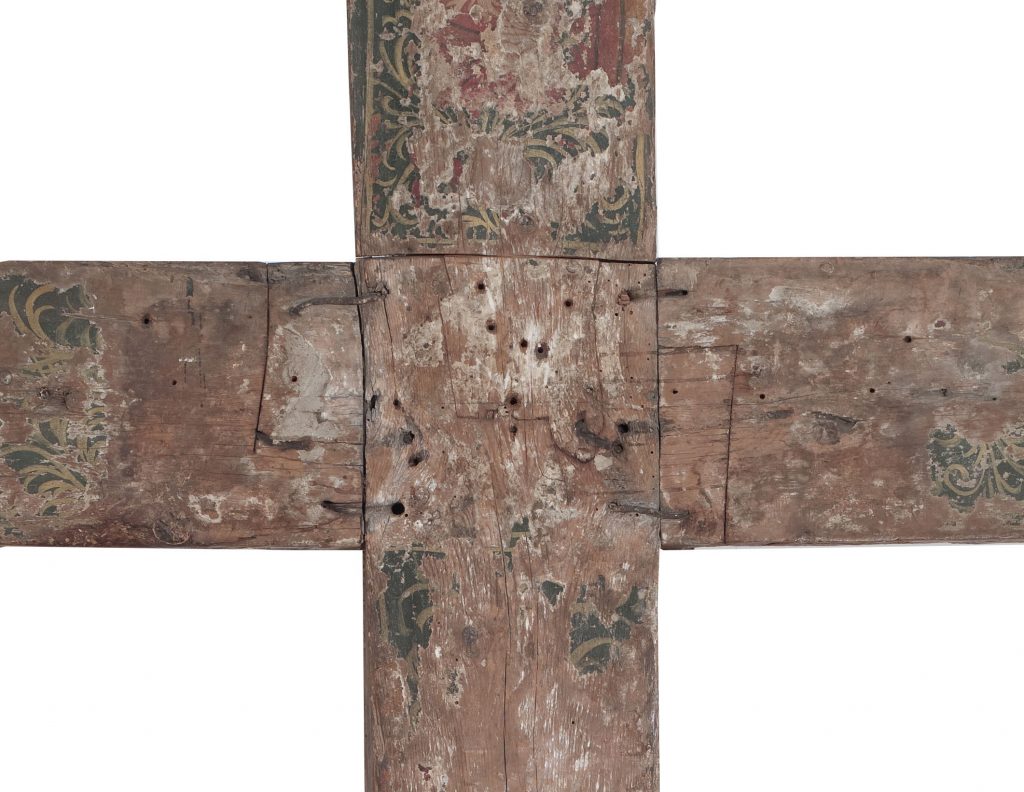
The cross is made of coniferous wood and formed by a shaft and a crosspiece fitted together with a half lap joint. As was said earlier, the cross is not the Christ’s original one, an issue ratified by the X-ray report confirming that there is no coincidence with the original pieces of wood that attached the Christ to its original Romanesque cross.
Among other clues, the construction of the cross has left us with two very obvious tool marks:
the first one is on the edge of the cross and the mark is formed by a series of incisions arranged in a line. The incisions could possibly have been made with a chisel or with a gouge, the work of which marked the edge of the rabbet. This rabbet was made with the adze, and it can be found all over the surface of the support of the front and the back of the cross.


The back at present, incisions in a line / The front at present. Photographs: Anna Carreras
The second tool mark is identified as having been made by an adze, and is found all over the surface of the support of the front and back of the cross:
As I have mentioned, on the back there are two polychromies preserved, and also two layers of preparation. After applying the first, older one, a piece of linen cloth was stuck to the areas where there might be a crack in the wood of the support, and possibly in the areas where the shaft and the crosspiece of the cross are joined together.
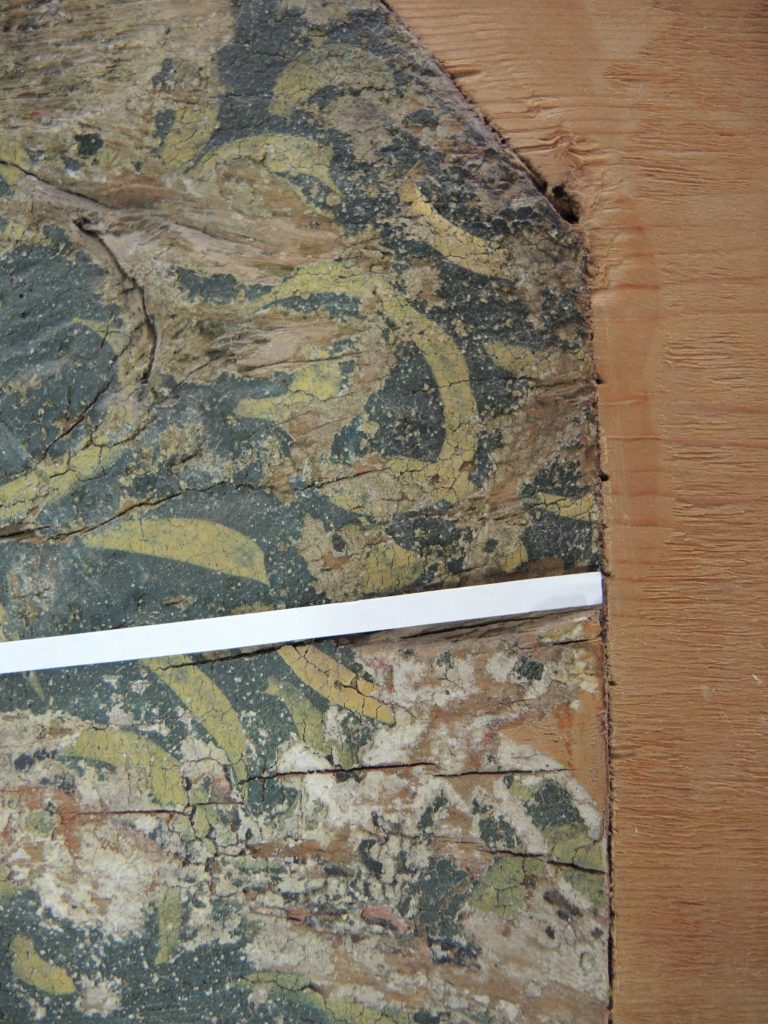
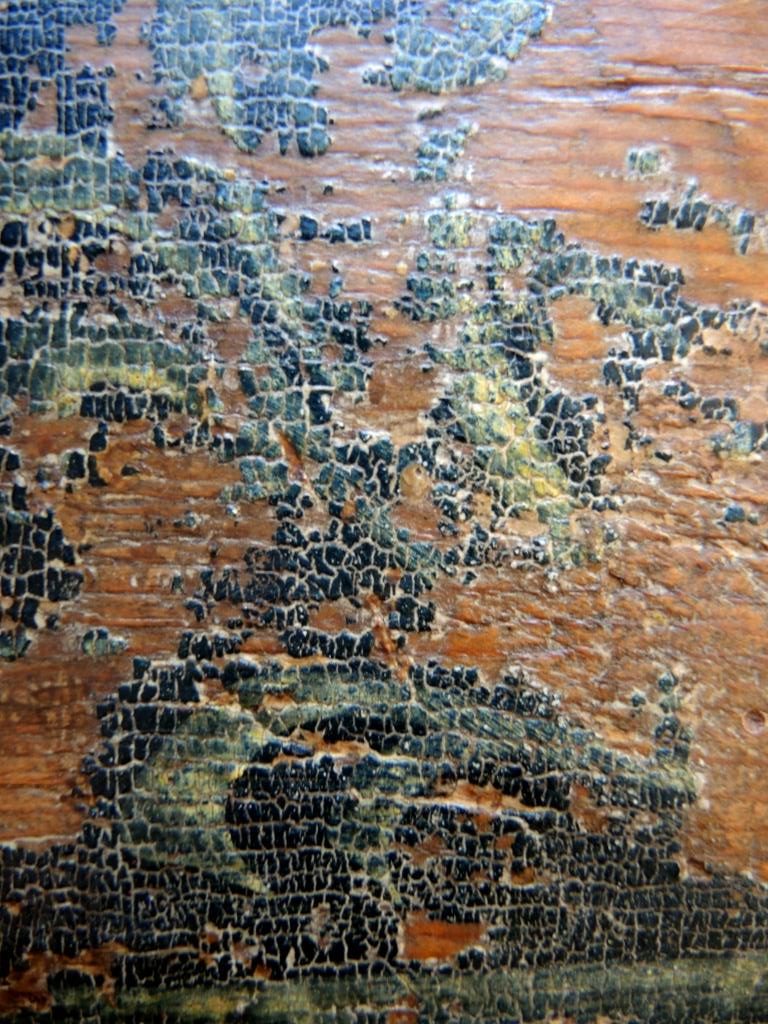
The front now conserves fragments of the green polychromy with yellow plant motifs and its layer of preparation to which I referred above.
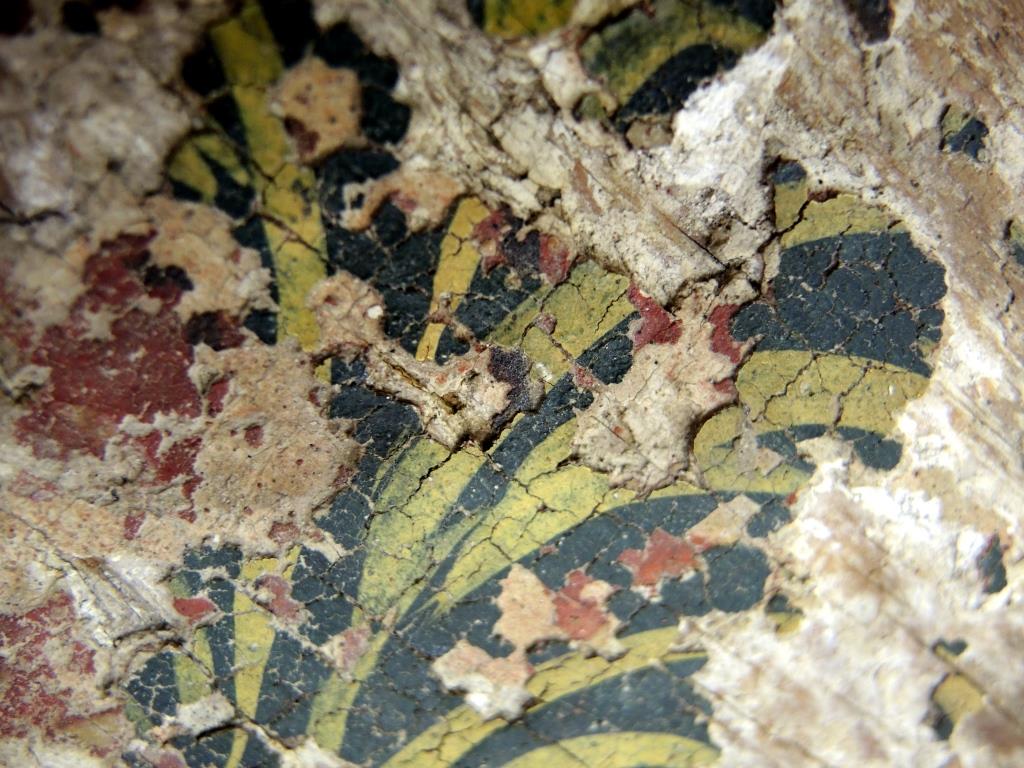

Details of the back at present, in which the two polychromies and the two layers of preparation can be observed. Photographs: Anna Carreras
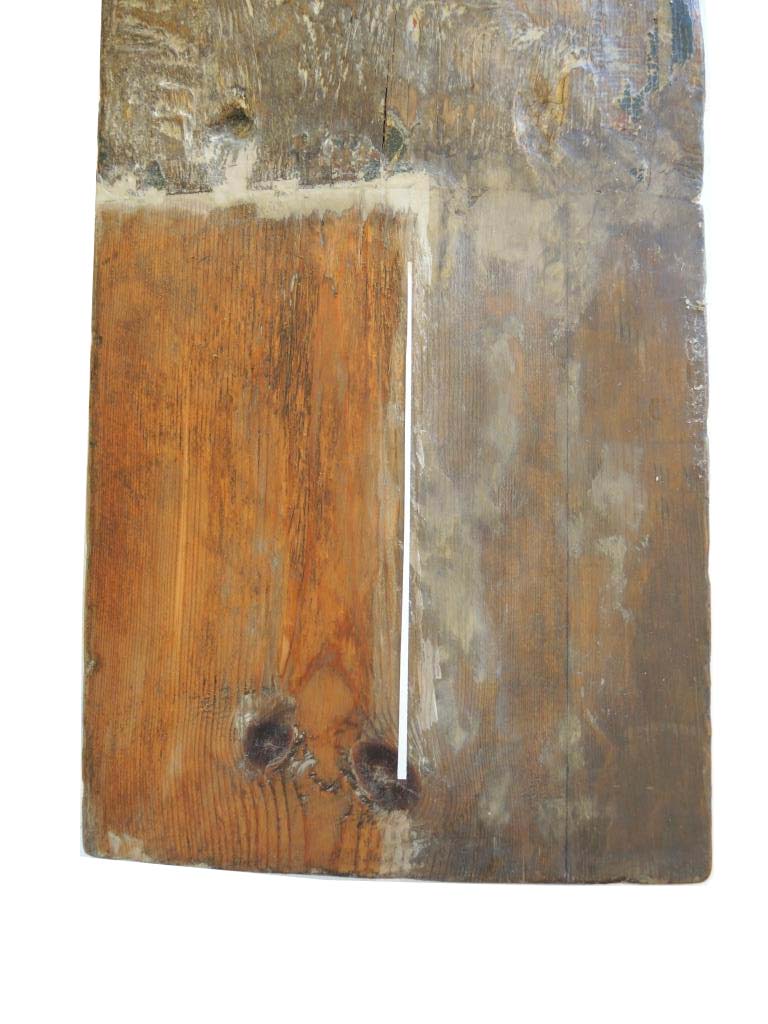
In the following X-ray image, it can be observed that the two ends of the crosspiece have been cut short at the two top corners. This mutilation could possibly have been done to make the cross fit in some architectural place, supposedly in the church of Sant Vicenç in Capdella, whence it comes. In the boxes outlined in black the three unpainted grafts of new wood can also be observed with which the ends of the crosspiece and the bottom of the shaft were remade. This work was done after 1937, by which time the group, from the Plandiura Collection, was already in the museum’s collection.

X-ray image: Àngels Comella
The next photograph, in which the Christ and the cross can be seen in the exhibition of Medieval Catalan Art in 1937, in the Château de Maisons-Laffitte in Paris, confirms this for us.
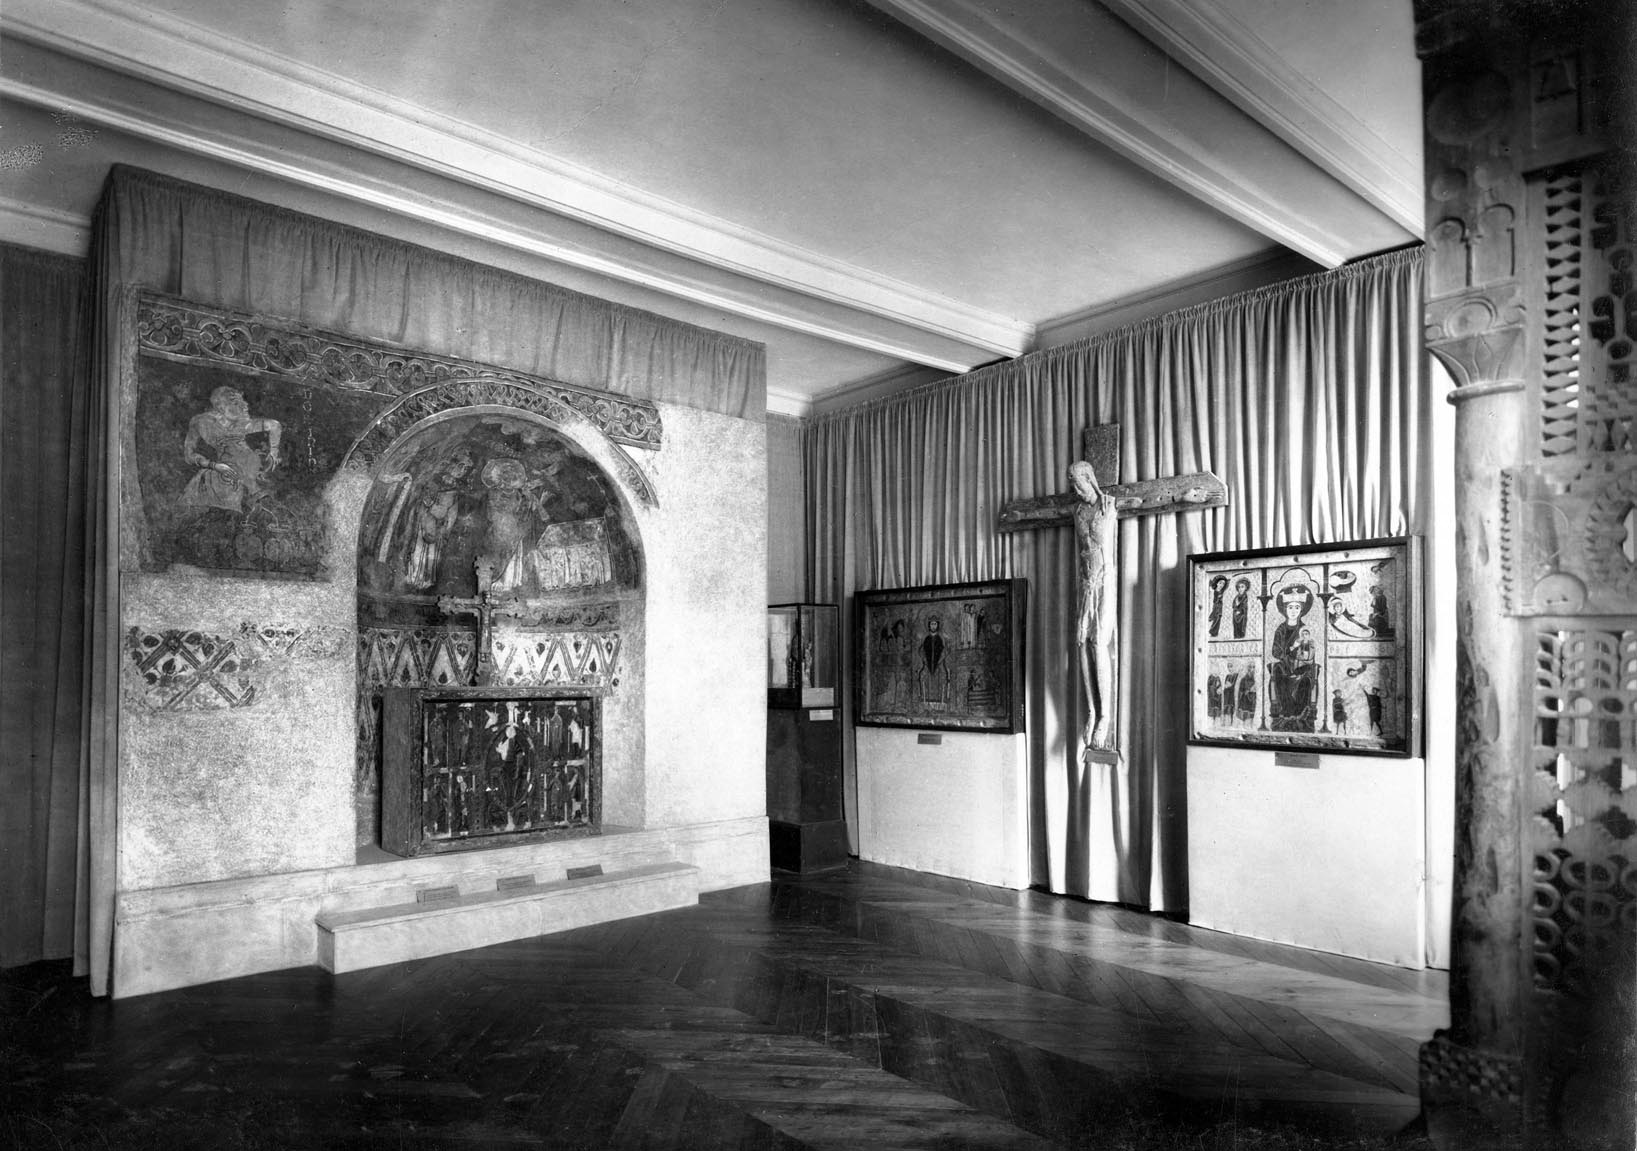
Exhibition “Medieval Catalan Art”, 1937. Photograph of one of the rooms in the Château de Maisons-Laffitte, Paris. Photograph from the National Archive of Catalonia (Collection of the Generalitat de Catalunya-Second Republic). ANC1-1-T-7597.
In this X-ray image it can be seen that at some time an attempt was made to cut the arms of the crosspiece and the shaft in the central area where the two pieces fit together, but without actually severing them. The image clearly identifies where the cuts in the crosspiece and the shaft go, and the later work that, with industrial nails, reinforced and joined the sawn area together.

Detail of the cross. In red the wrought-iron nails, in blue the industrial nails, in green the holes for the non-original pieces. The black arrows mark the lines where the attempt was made to cut it. X-ray image: Àngels Comella / Photograph with visible light. Photograph: Anna Carreras
Restoration basically consisted of disinsectization through anoxia, followed by a surface cleaning of the polychromy after fixing the peeling areas. The cleaning of the added grafts, the filling of the holes made by xylophagous insects, and finally the inpainting, completed the intervention.
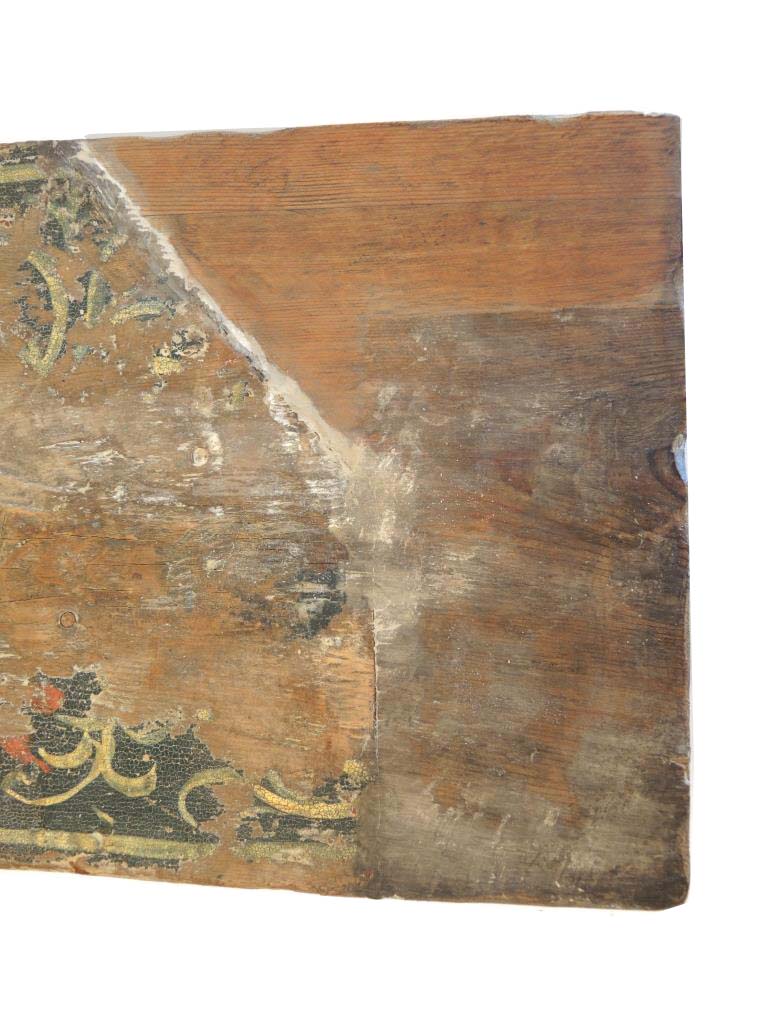

Process of cleaning the right graft in the shaft of the cross / Process of cleaning the graft in the shaft. Photographs: Anna Carreras
Front of the top of the shaft at present / Back of the right end of the crosspiece at present.

Photographs of the inpainting process in which it can be observed that the white line marks the inpainted area / Process of filling the holes made by xylophagous insects. Special dyed wax is used for restoration. Photographs: Anna Carreras.
The Christ
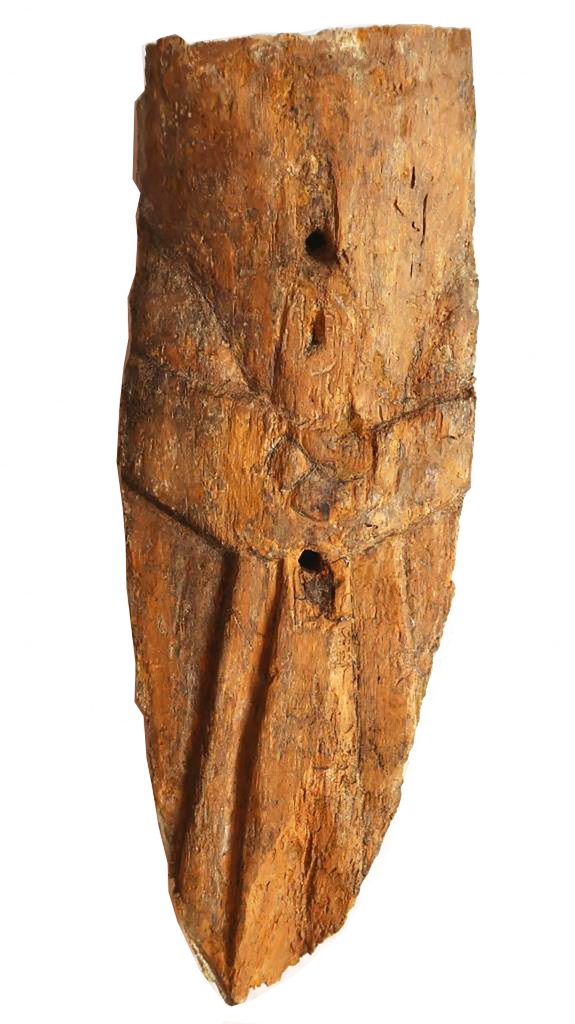
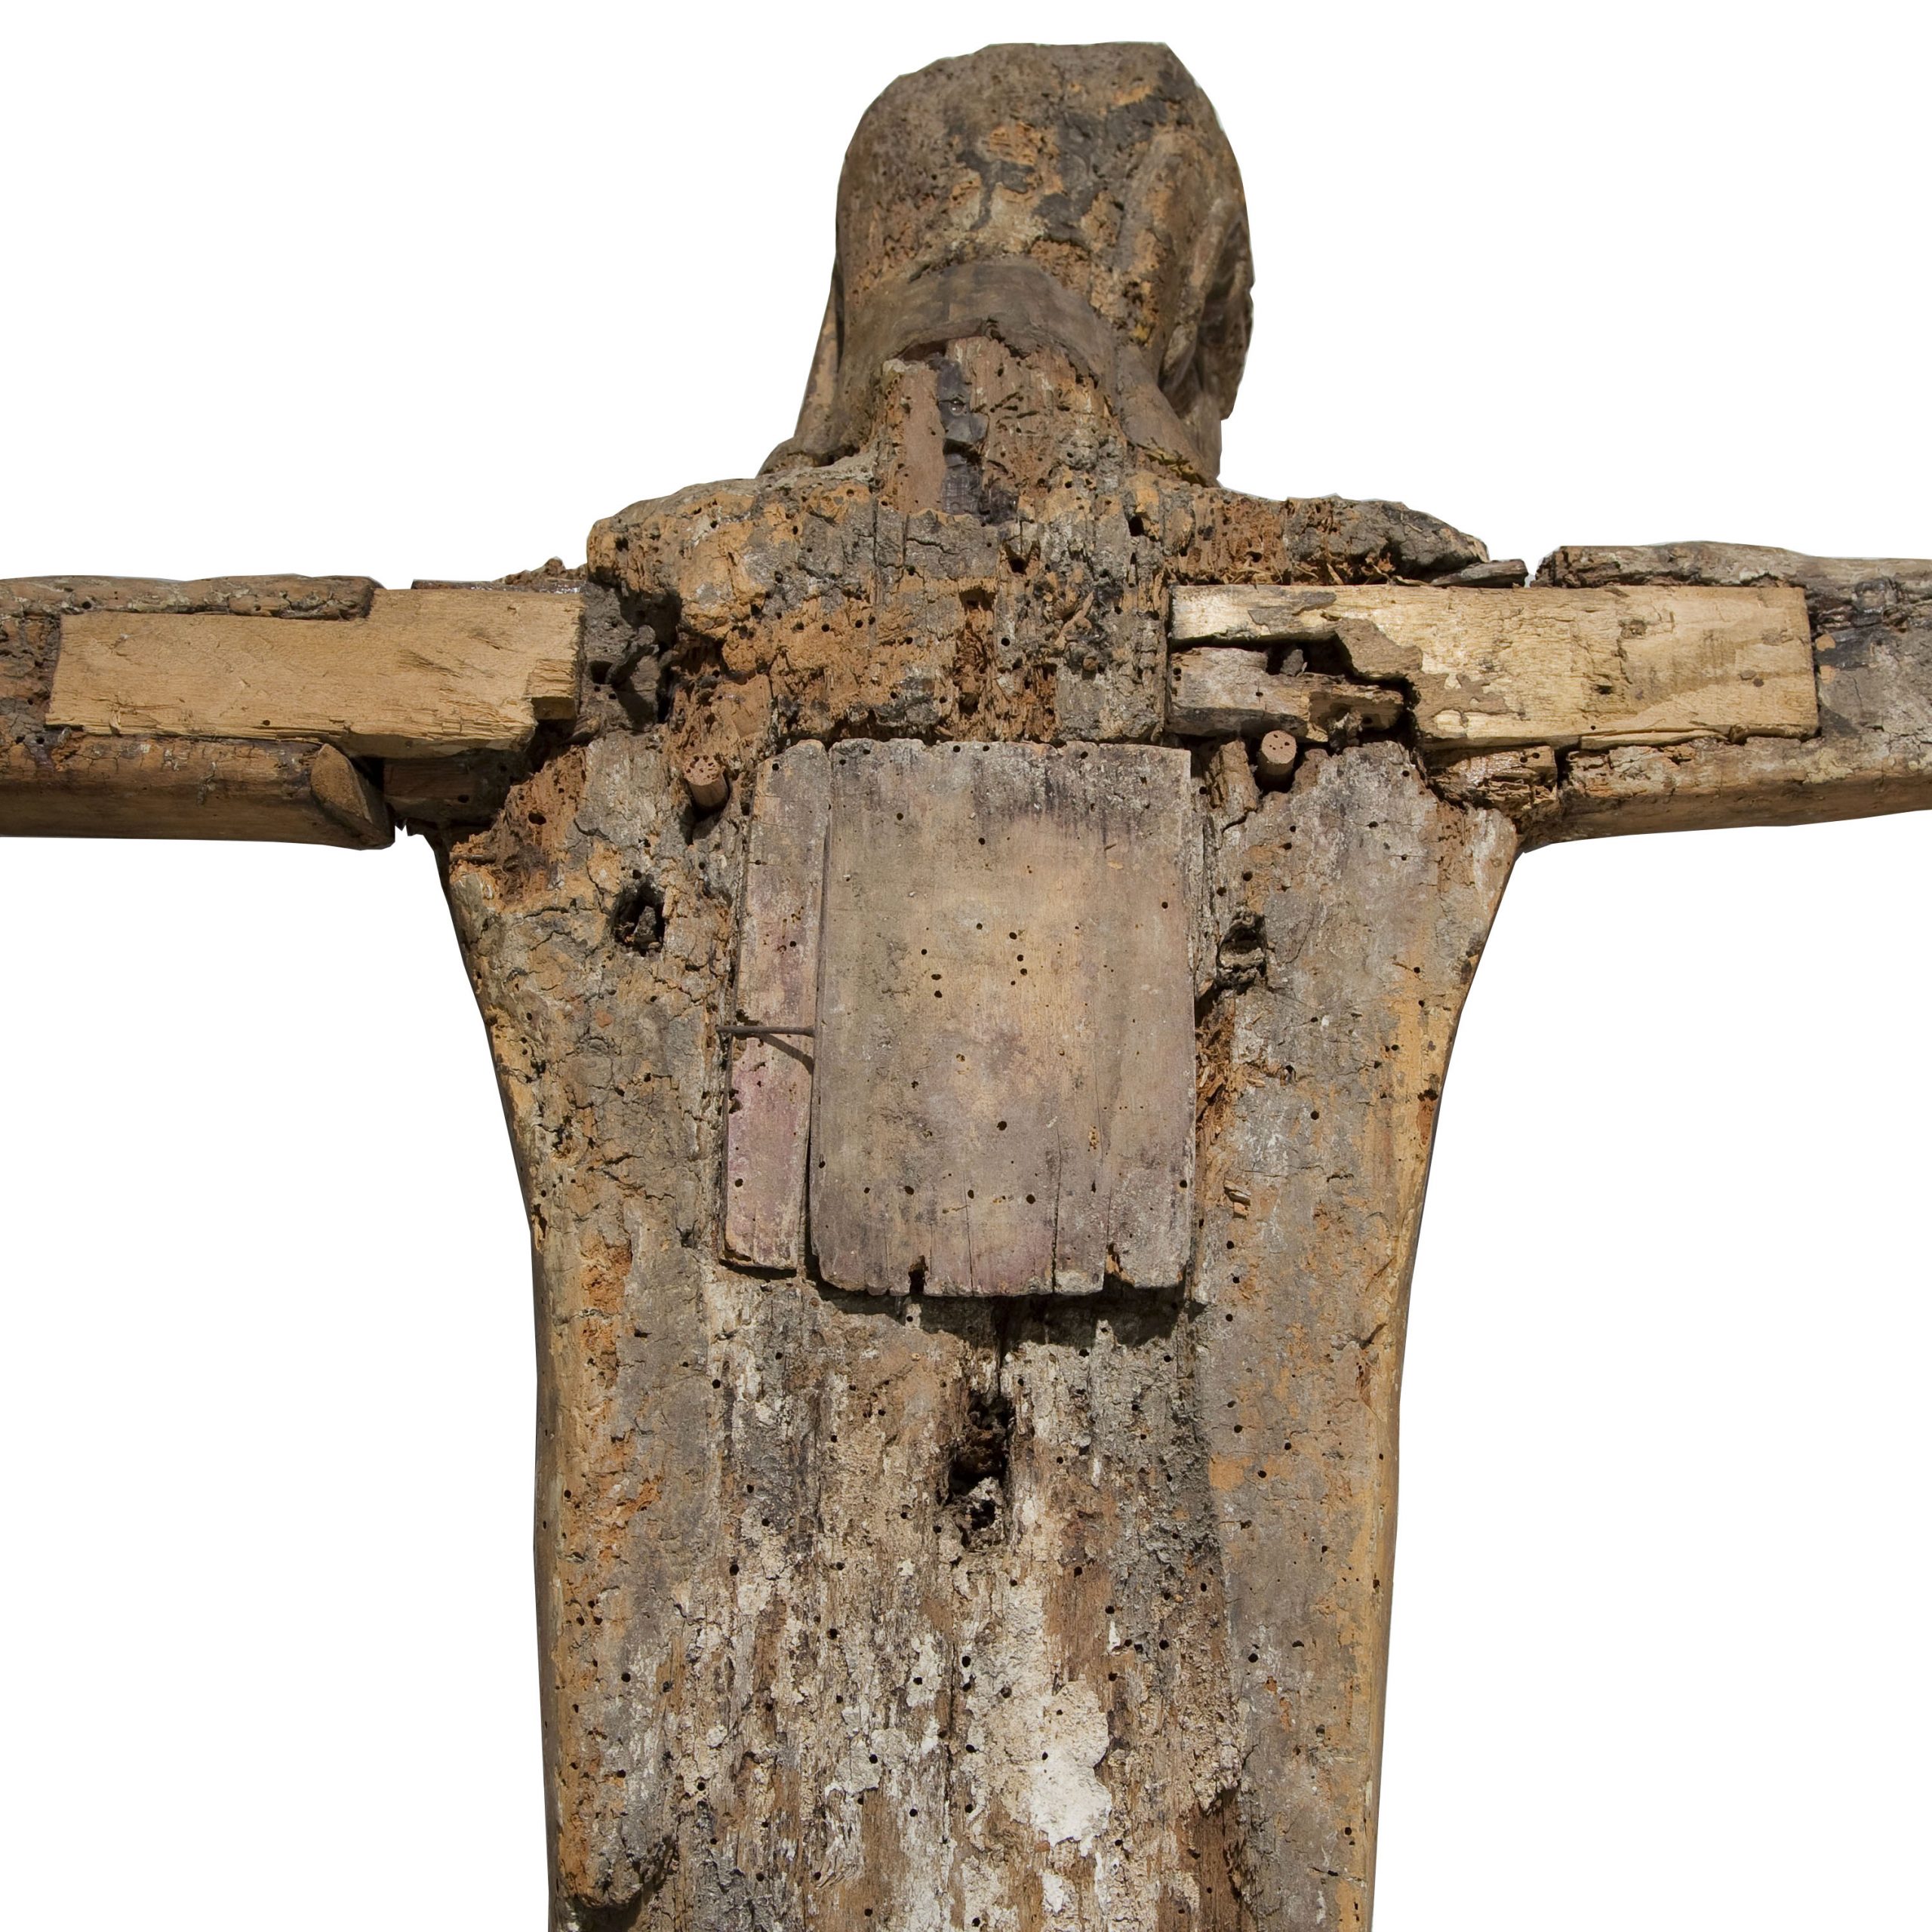
The Christ is in willow seriously damaged by the action of xylophagous insects. It conserves loose traces of polychromy and a layer of preparation from different periods. On Christ’s left ear a small piece of cloth can be seen, possibly the original Romanesque one. We have to remember the existence of the graft of new wood that was adhered to the back of the neck with the intention of changing the inclination of the head, one of the aesthetic modifications mentioned earlier.
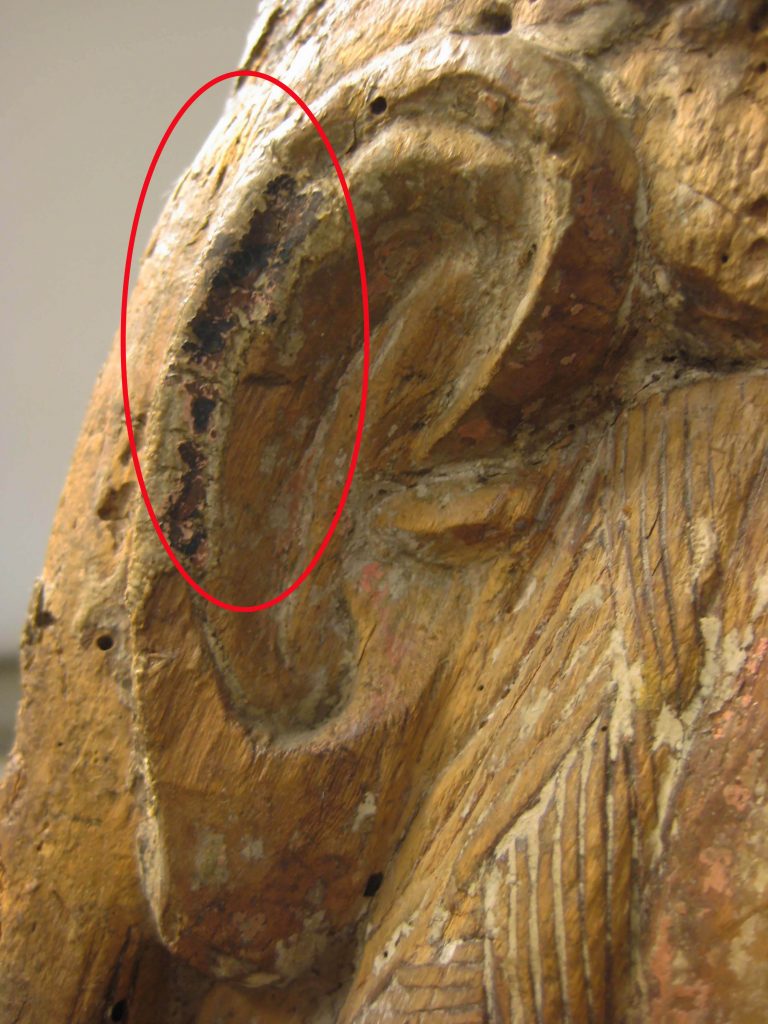
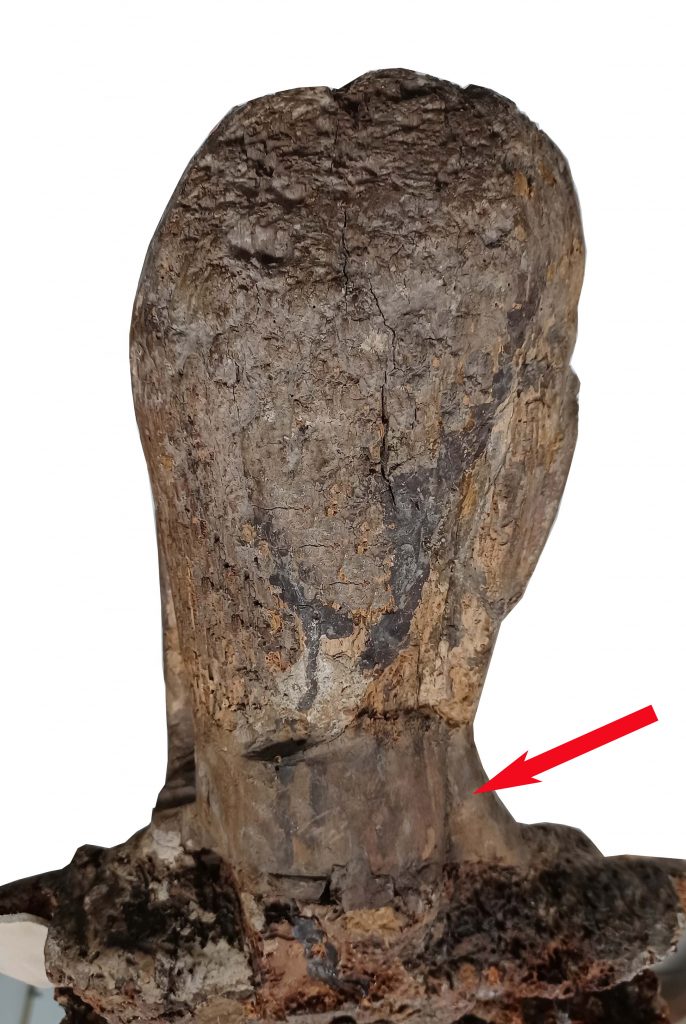
Detail of the cloth on the ear and of the graft applied to the back of the neck. Photographs: Anna Carreras
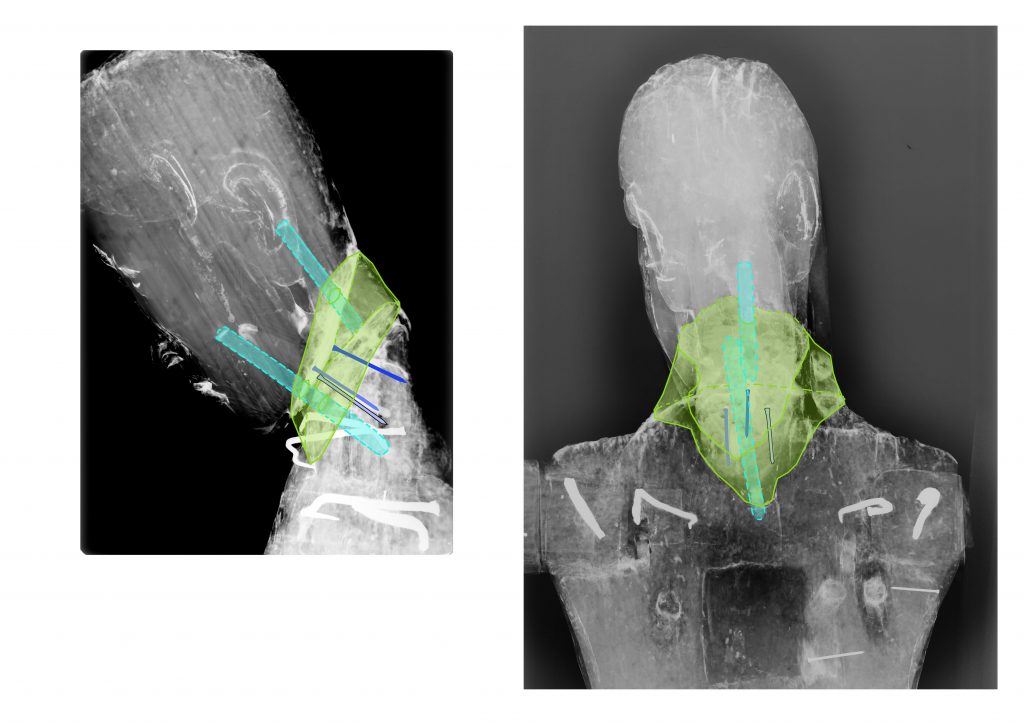
In light green the new graft, in light blue the pieces of wood and in dark blue the industrial nails. X-ray image: Àngels Comella
Consolidation of the support and filling of orifices
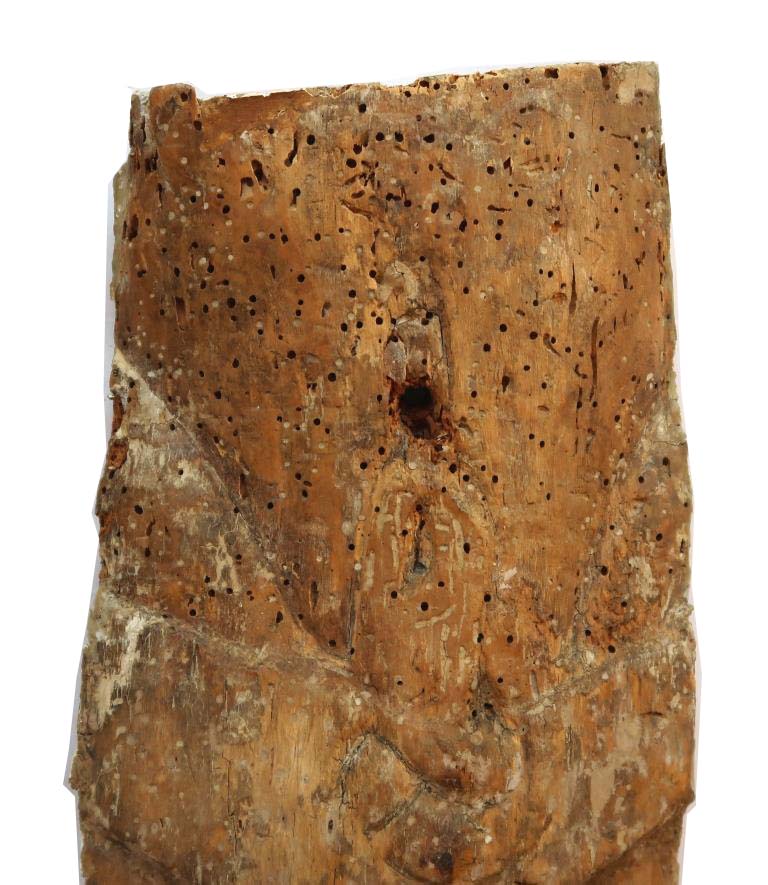
The Christ was attacked by xylophagous insects shortly after its Romanesque construction. This action substantially damaged the morphology of the wood and transformed it into a porous and fragile material. After disinsectization through anoxia the support was consolidated by applying a “drip by drip” treatment with a consolidating product that slowly spread over the entire surface of the support. This was done with the arms detached, from the back of the piece and through impregnation, thus enabling the support to gain consistency. When this consolidation process was finished, which made it easy to handle the piece, we proceeded to fill all the xylophagous orifices and to repair small gaps in the support. A type of wood powder was used with pigments and a binding substance that was matched depending on the area that had to be repaired. The process was very meticulous and was carried out with precision tools, and also by injecting the product to reach the deepest orifices.

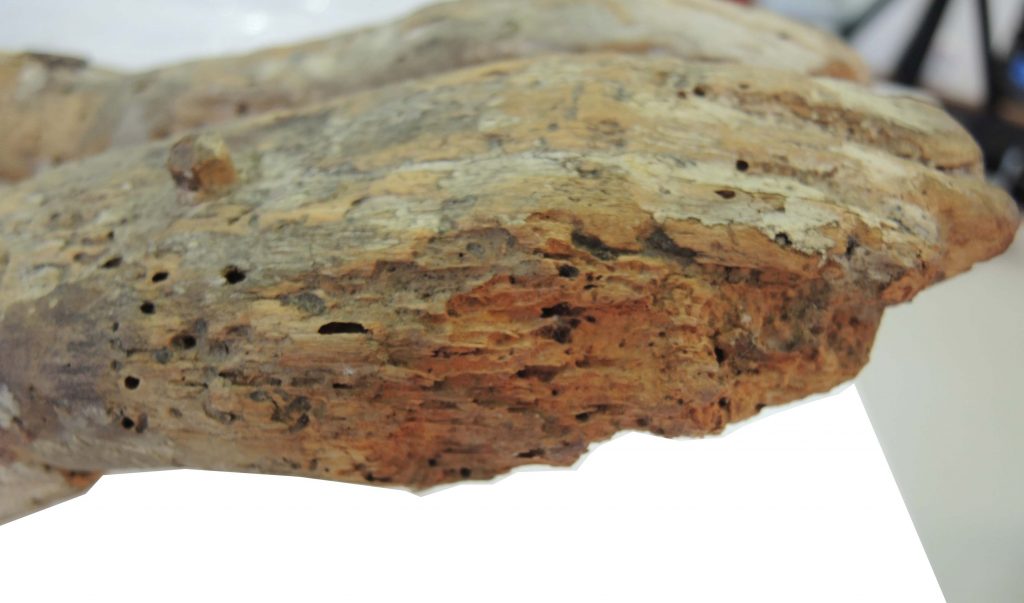
Back Left foot. Photographs in detail of the support’s condition. Photographs: Anna Carreras

Process of filling the orifices. The bottom of the graft is already finished.

Photograph of the process and the end. Photographs: Anna Carreras.
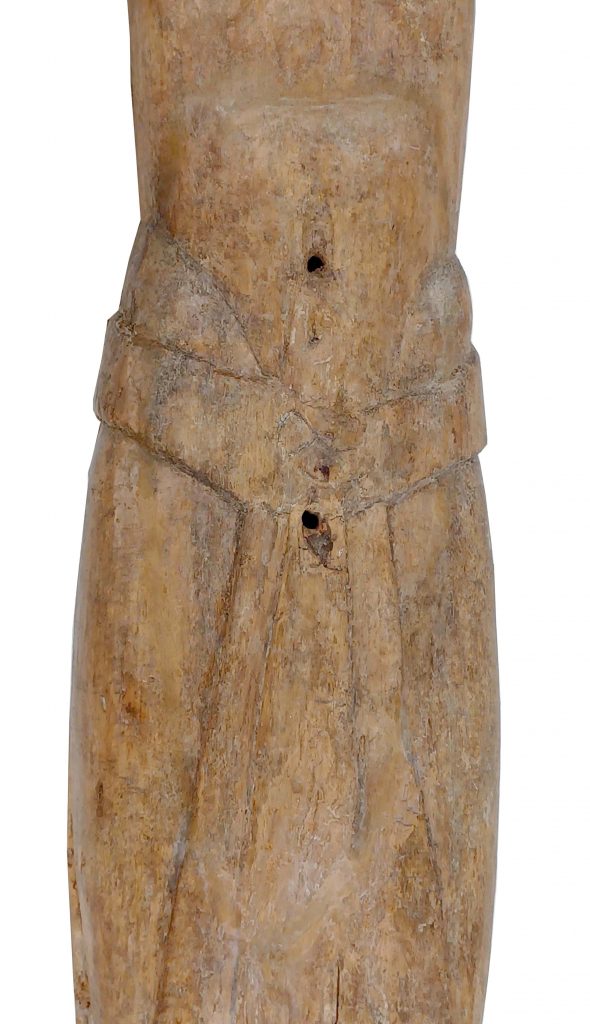
Treatment of the graft in the area of Christ’s stomach
As has already been said, a singular element of the Christ is the graft of wood located in the area of the stomach and perizoma (loincloth) that covers a gap in the support. It was evident that this had been opened and, as old photographs show, it had been wrongly relocated leaving the creases in the loincloth out of place. The restoration consisted in separating this piece and trying to put it back in its original place according to the line of the creases. Finally the entire perimeter was sealed with stucco and it was inpainted.

Photographs of before and after the restoration work. Photographs: Anna Carreras.


Details of the opening of the graft with the socket and of the process of levelling. Photographs: Anna Carreras.

Inpainting. Photograghs: Anna Carreras.
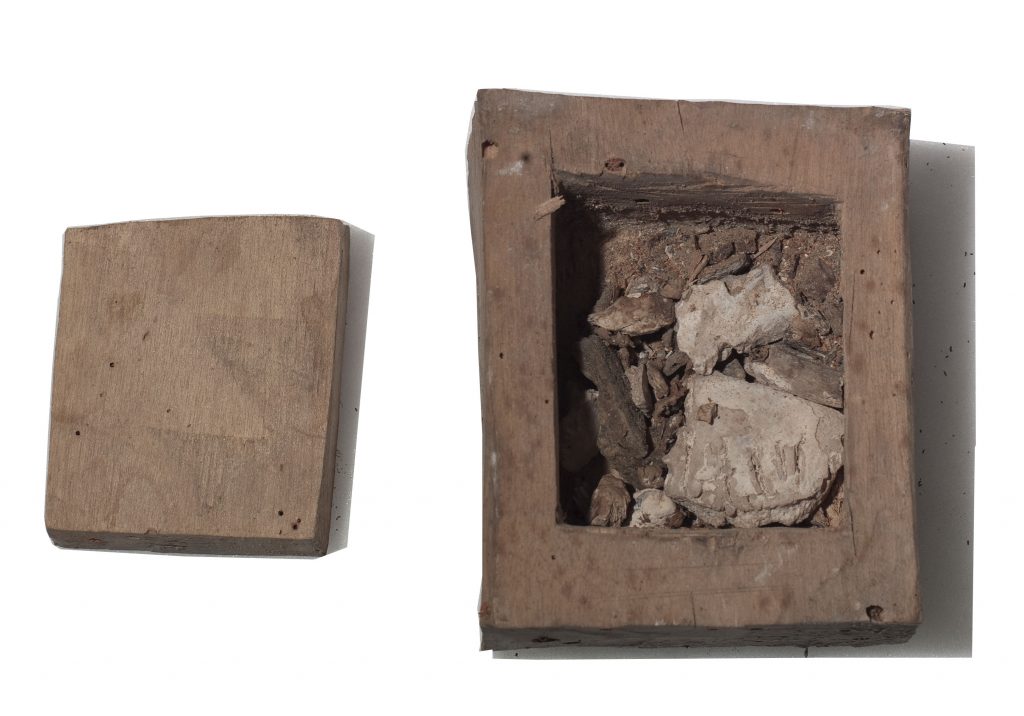
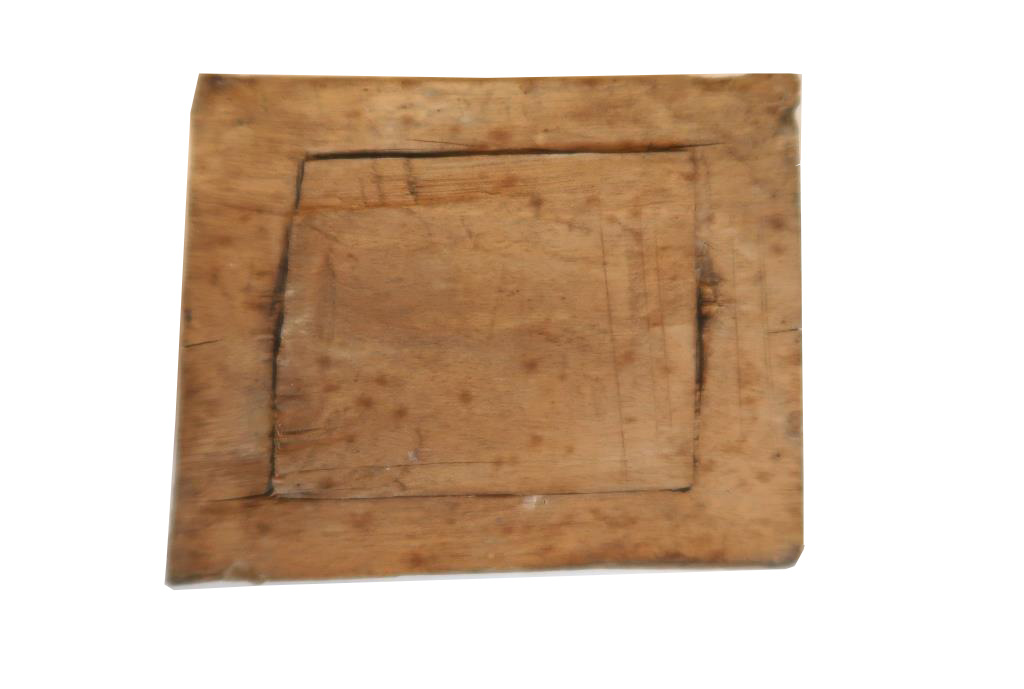
As can be observed in the following photograph of the back, the lid of the possibly unoriginal reliquary was kept in place precariously with industrial nails, a detail that tells us that the receptacle was opened in modern times when, according to the bibliography consulted, art historian Joan Ainaud de Lasarte was the director of the Museu Nacional d’Art de Catalunya. This singular feature made it necessary to work on this area. In the first place the contents, bits of bone, were arranged in small sealed conservation bags, and a note was left with the date of this work. Prior to that, the treatment to consolidate and fill orifices in the reliquary had been carried out.
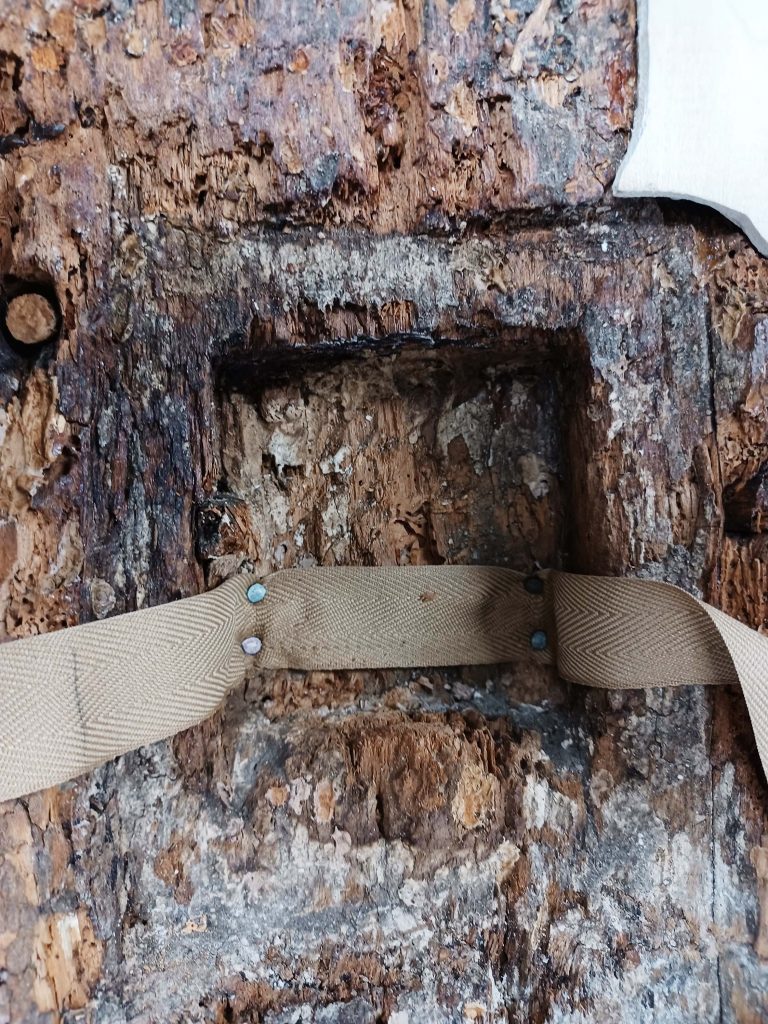
Shortly before completing the overall restoration of the Christ, the best way of replacing the reliquary in its lidded receptacle was considered. The solution consisted in using a passementerie ribbon similar in colour to the wooden support, and Velcro to fasten it. In this way further work on the wooden support was avoided, which, as I said, is badly damaged.

Photograph before the intervention. Photographs: Anna Carreras.
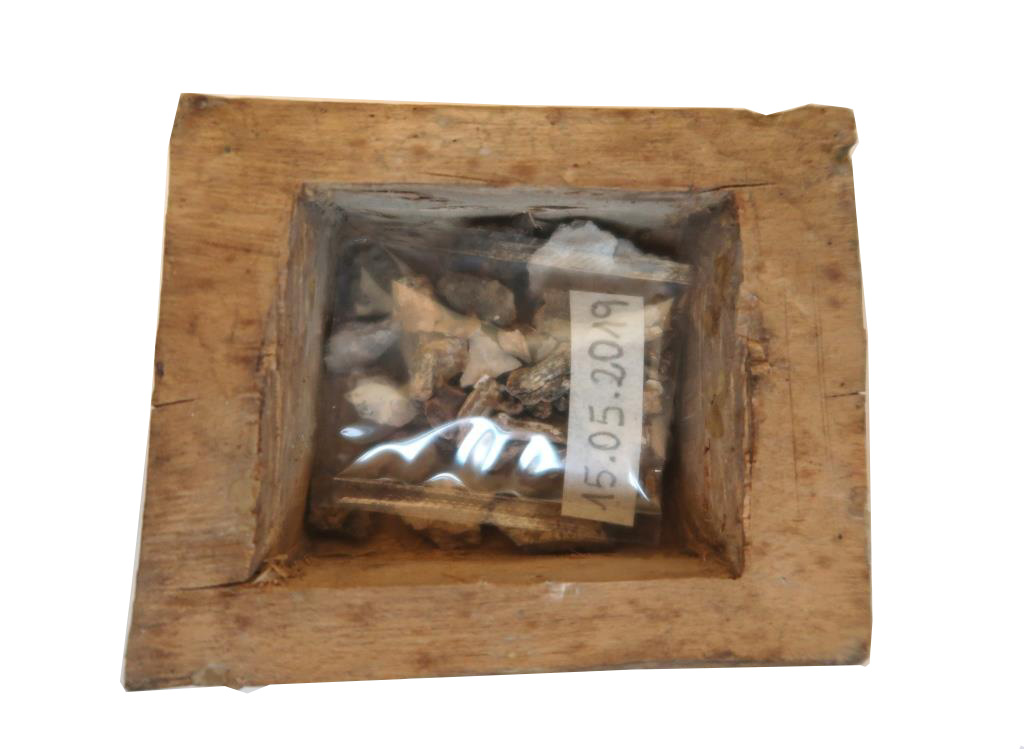
Photographs of the intervention and the arrangement of the bits of bone. Photographs: Anna Carreras.
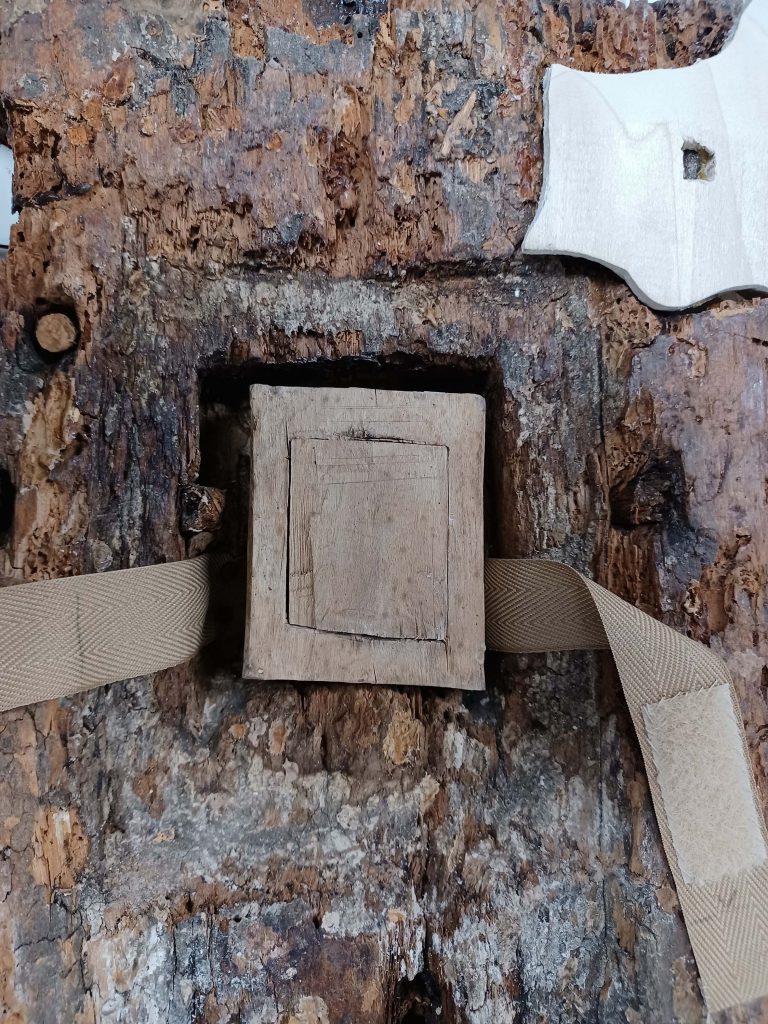
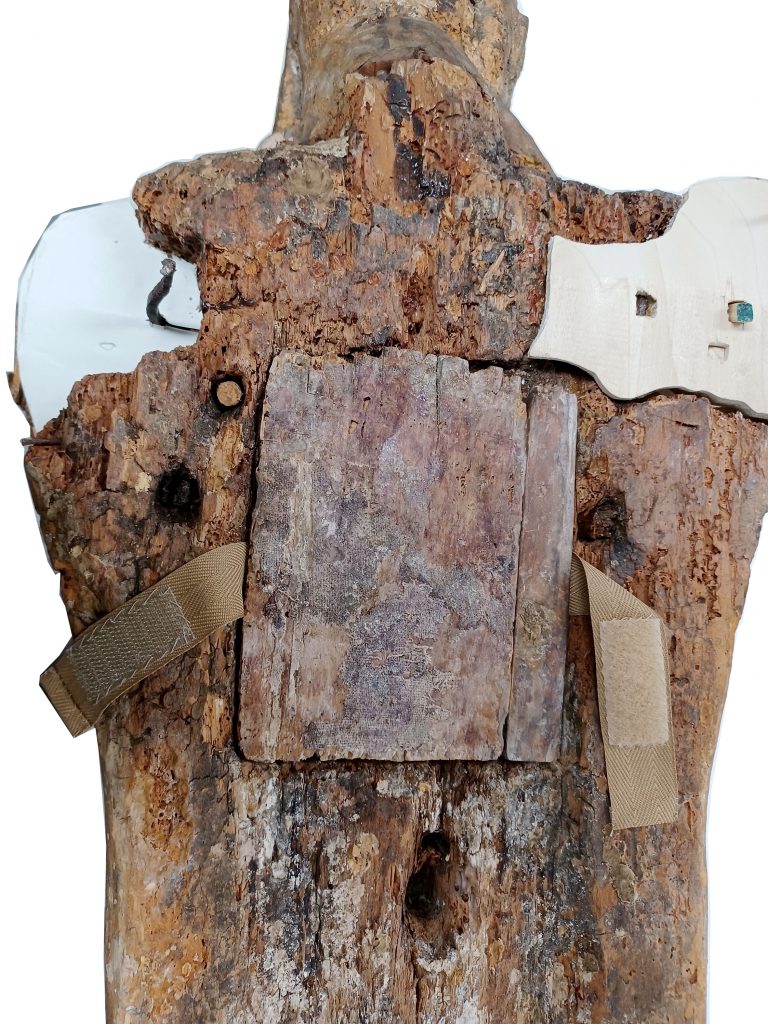

Photographs of the process of closing the receptacle. Photograph: Anna Carreras.
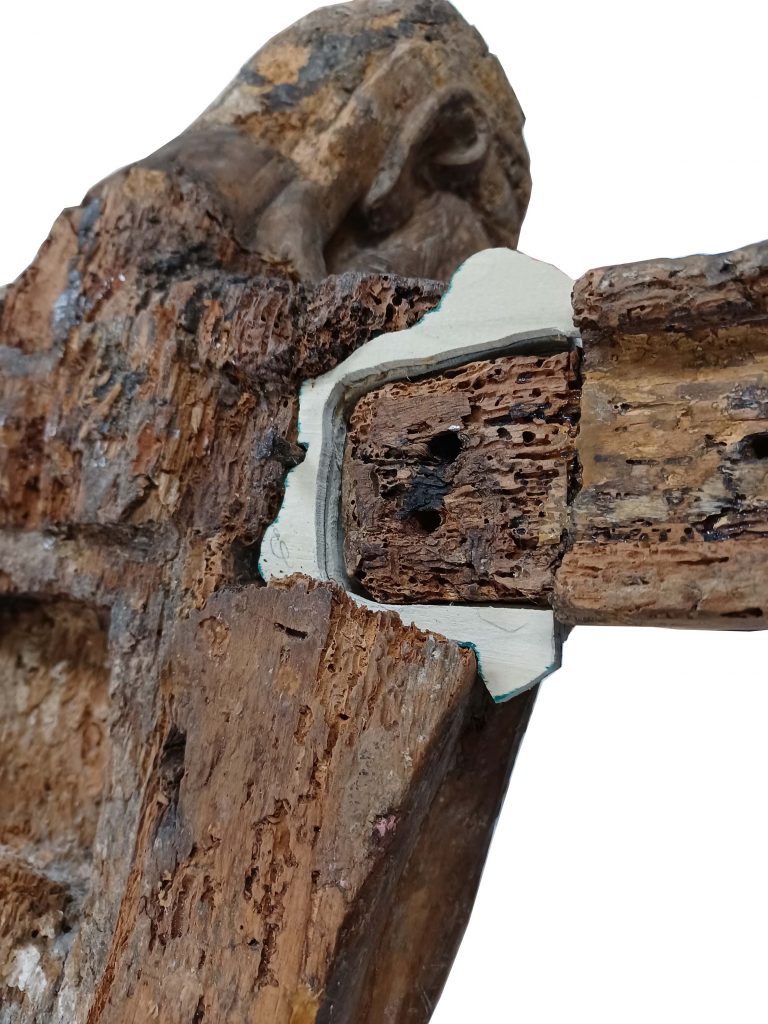
Restoration of the arm sockets
The sockets between the arms and the trunk of the body were completely deteriorated and had lost the volume and the rigidity necessary to sustain their weight. In some earlier restoration work the arms had been sawn off their sockets and a graft with new wood was stuck on that did the job of keeping the arms horizontal on the Christ’s cross. With the current intervention these new grafts were eliminated and the original socket was recovered.

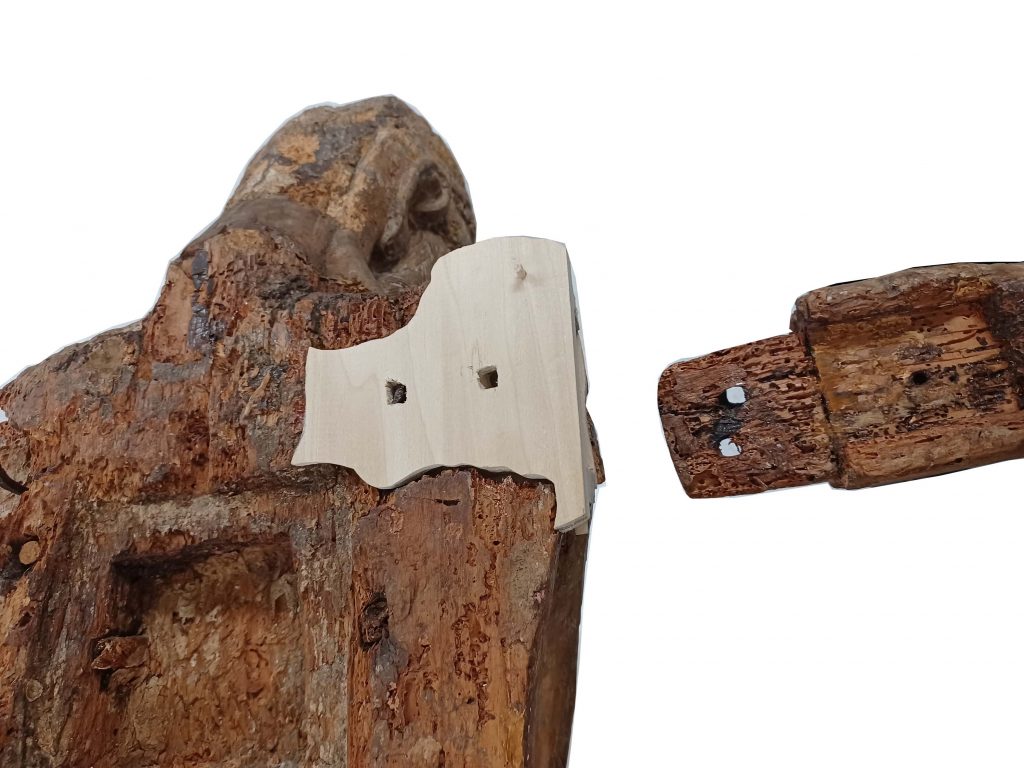
Photograph prior to restoration. The new grafts can be seen that were eliminated to recover the sockets corresponding to the original position of the arms / 3D negative of the hollow in the original socket. Photograph: Marta Mérida
Reproducing the original socket was feasible but it did not stabilize the horizontal position of the arms on the cross, as the deterioration of the wood had left a hollow between them that it was necessary to fill. The conservator-restorer of supports, Pere de Llobet, came up with a system that, based on making moulds and countermoulds of the area that had to be worked on, and with the subsequent 3D print of the hollow, enabled him to produce a piece of willow that fitted perfectly in the Christ’s shoulders. In this way two objectives were achieved. The first was to recover the original sockets. The second is that the new system of presentation allows us, if necessary, to detach the arms without damaging them.
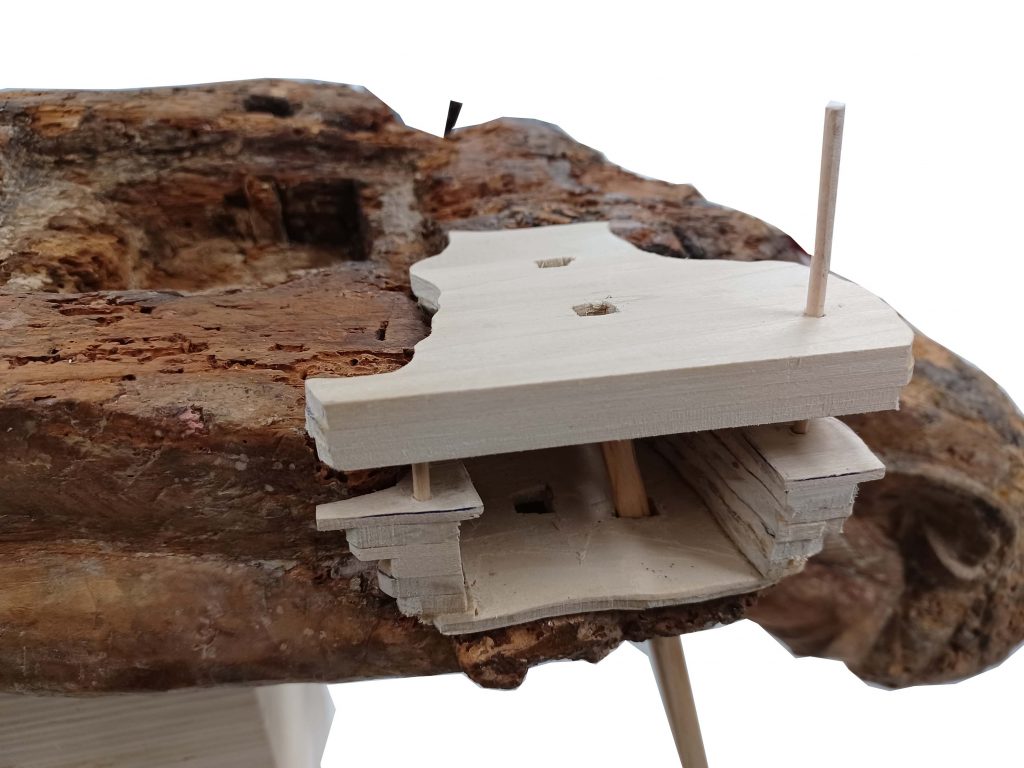
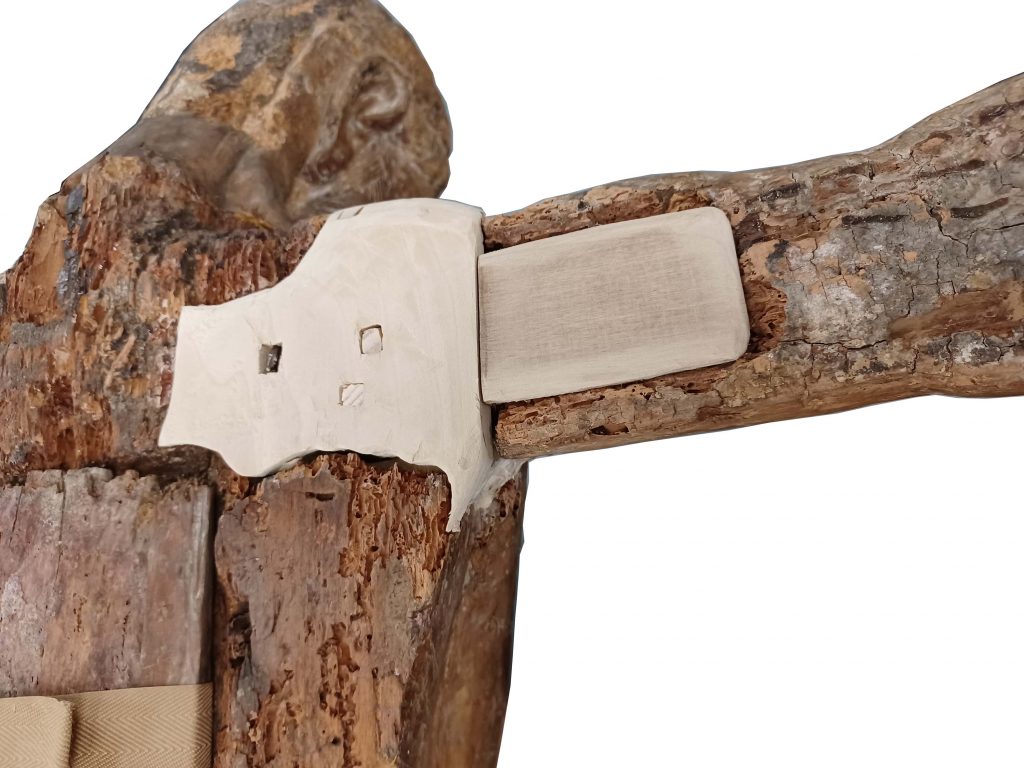
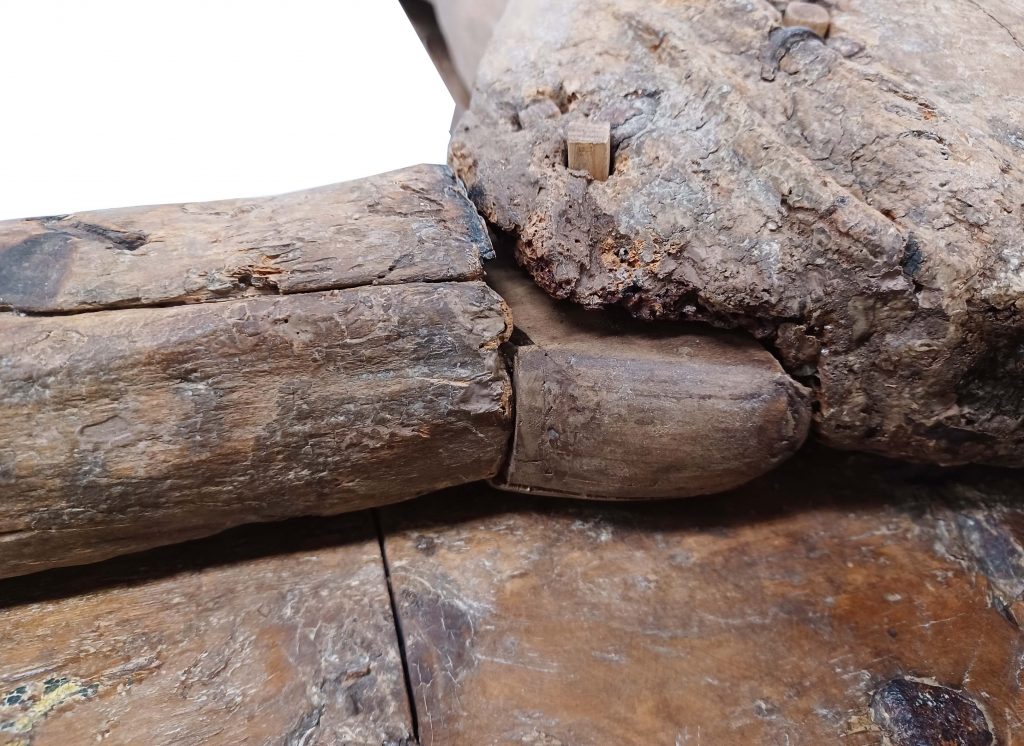
Photographs of the back and the front of the right shoulder. Photographs: Anna Carreras.

Final result. Photographs: Marc Vidal
* The process of conservation-restoration has made it possible to make an in-depth study of the history of these pieces and the system used to build them. Our thanks to the conservator-restorers in the Area who kindly advised us while this difficult restoration was being carried out.
Conservació Preventiva i Restauració